Your address will show here +12 34 56 78
Drylands Management, Organic Gardening, Sunseed News, Volunteer Stories

The first rains of the season have been and gone… and they have left their mark on the land here. Our beautiful poza looks different from last week, because the water swept through the valley, knocking caña aside and carrying with it the dust and soil from the surrounding hills. The hills themselves look so much cleaner, the plants have definable and separate colours, rather than all being coated in the fine dust, early mornings are sweet with soft dew, and even the air feels fresher.

Before and After the Storm

***

We knew the rains were coming days before they arrived, though the amount of precipitation was often in question: We were told to expect 40mm to fall on Thursday, three hours later that had gone up to 100mm and 200mm on Friday but over the next day the prediction dropped to 40mm over 4 days, only to shoot back up to 100mm in 3 hours. The weather warnings for the area were Violet. So, understandably, we doubted the truth of the forecast once or twice. How could so much rain be coming when we were enjoying such glorious sunshine? Still, precautions were taken and we spent a morning preparing Sunseed for the likelihood of a heavy rain. Gabriel, our organic gardens coordinator led a team in sand bag collecting. They lugged the heavy bags from the gardens to the main street of the village where they built banks to protect the road from the floods of water. Tanks were positioned to collect the rain, so that we could make the most of the precious water, and where necessary buckets were placed to catch the leaks in the roofs.

The next day we watched as the rain clouds gathered at the edges of the valley, laden with their blessing of much needed water they drew nearer and nearer. Most people had found inside jobs to do during the day to avoid getting wet, and we sat around the house, trying to use as little electricity as possible. The clouds meant that the solar system wasn’t working at full capacity and once it dropped down to 90% we could not charge any devices, despite this the atmosphere around the main house was one of excitement.
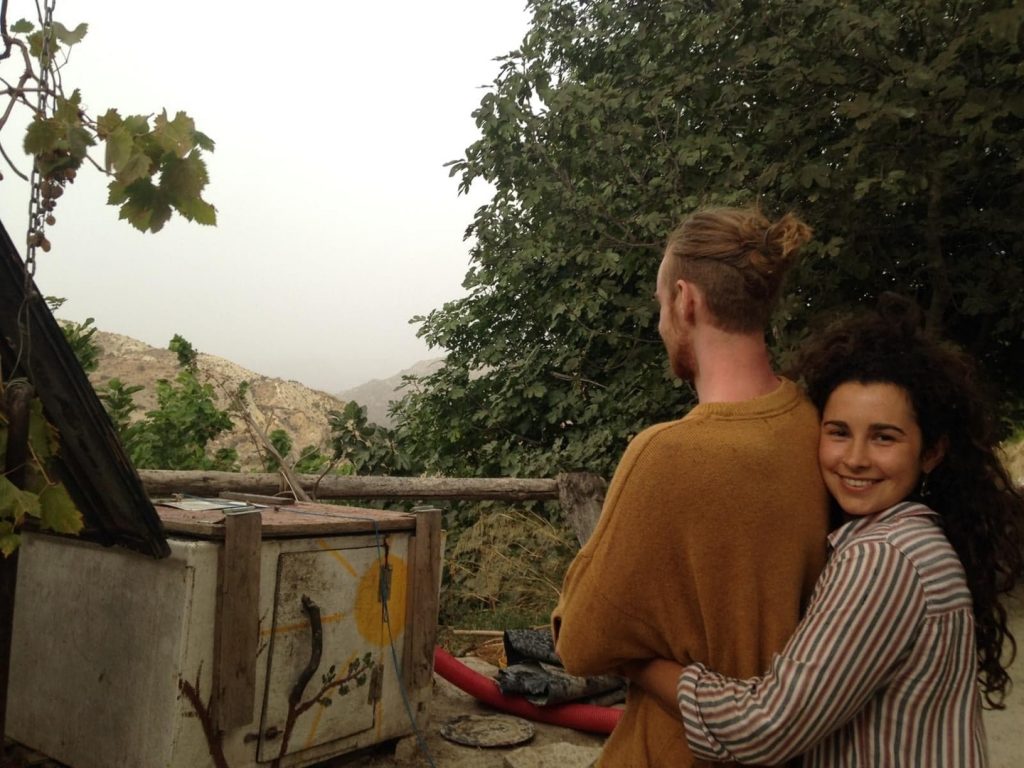
Waiting for the storm

And then the rains came. They hammered, heavy and hard into the dry earth, the first few drops sending little flurries of dust into the air, until everything was soaked. It was only minutes before the main street of the village had become a river, flowing over our bare feet where we stood soaking in the water, just like the plants.
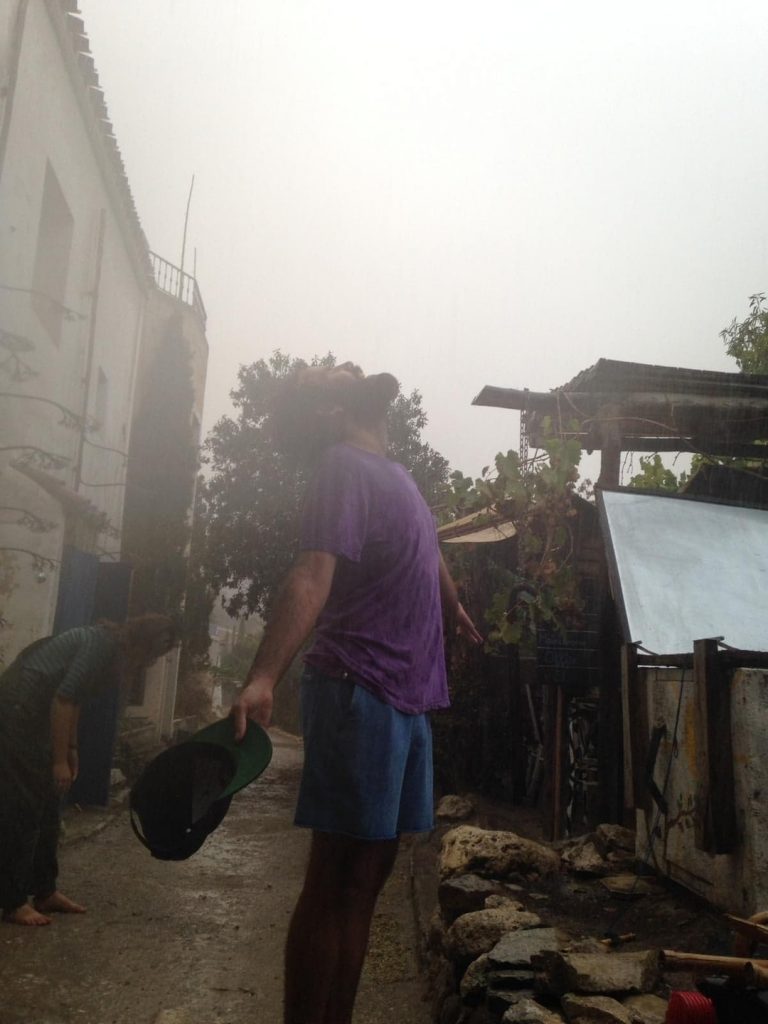
Soaking up the rain

In the evening the storm picked up. Lightning flashed across the sky, illuminating towering cloud formations and thunder rolled through our valley. We stood huddled in the doorway of one of the buildings, watching the water run down the main street. We laughted as we tried to avoid the rain, splashing through the streams and puddles and even pausing to dance under the torrent. That night, warm and dry once more, the rain beat a comforting rhythm against the roofs and, after a summer of heat, blankets were pulled from cupboards and onto beds.

On Friday in the pouring rain Gabriel, Tom, and our neighbour Dave Dene fixed the floodgates of the acequia with yeso, which sets underwater. So now all that we needed to do was clear the new mud from the acequia. Luckily, Saturday was the communal acequia maintenance day and we were joined by our neighbours to clear the acequia. We were up to our knees in the water channels scooping mud into buckets with our hands. Squeezing between caña and under hanging brambles we cleared the areas of the acequia that were worst affected by the rain and the silt that it had carried with it.
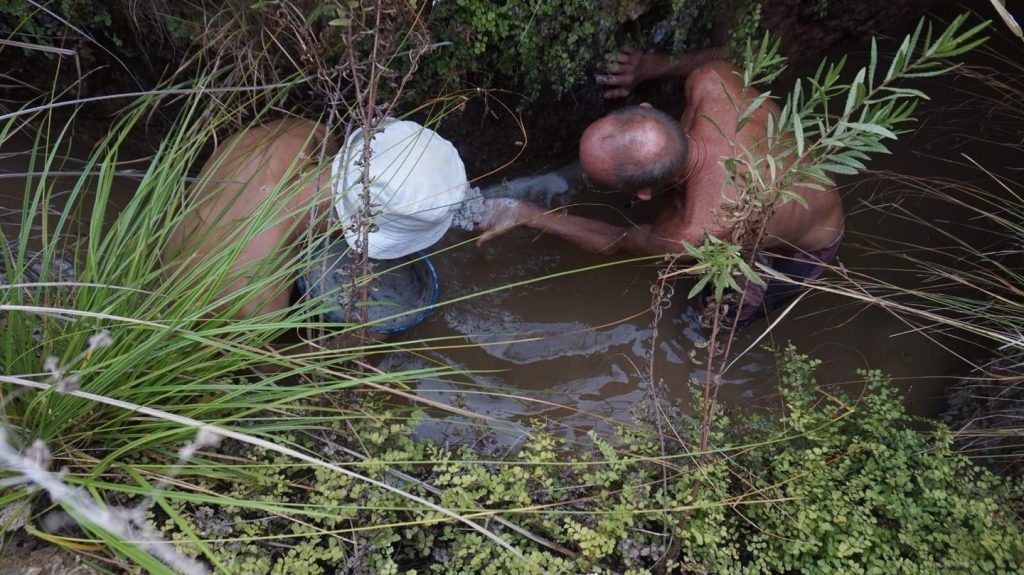
Cleaning the acequia

Once finished we trouped, muddy and tired, back to Sunseed’s main building. But, because the acequia wasn’t running yet, the village ram pump wasn’t working, and we had very limited water for washing. Using water collected from the rains we washed the mud from hands and faces and then settled in to enjoy our Saturday.

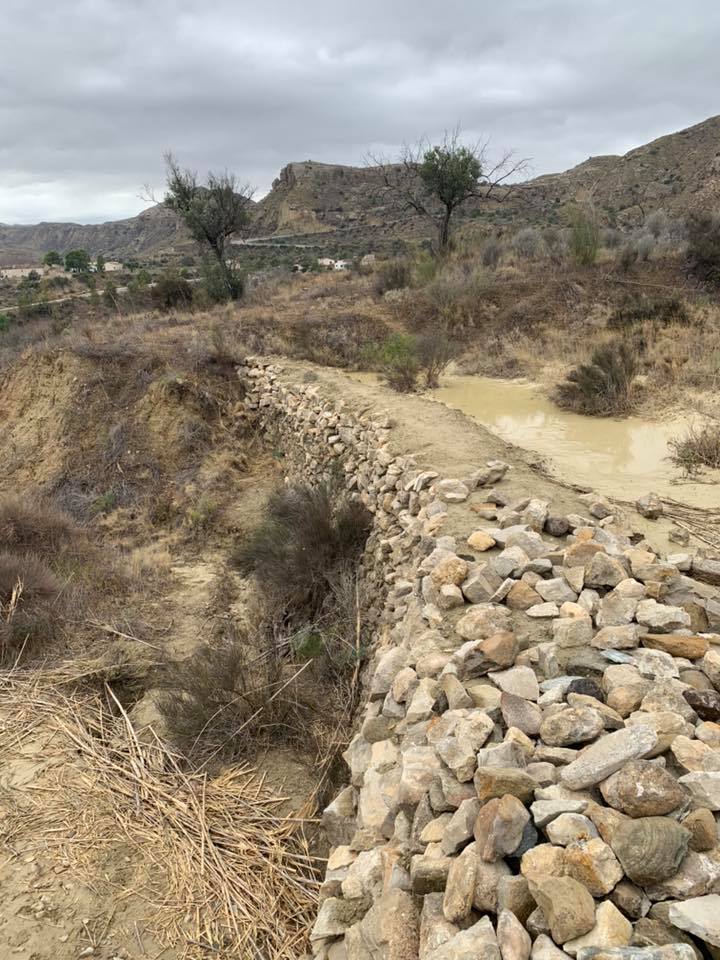
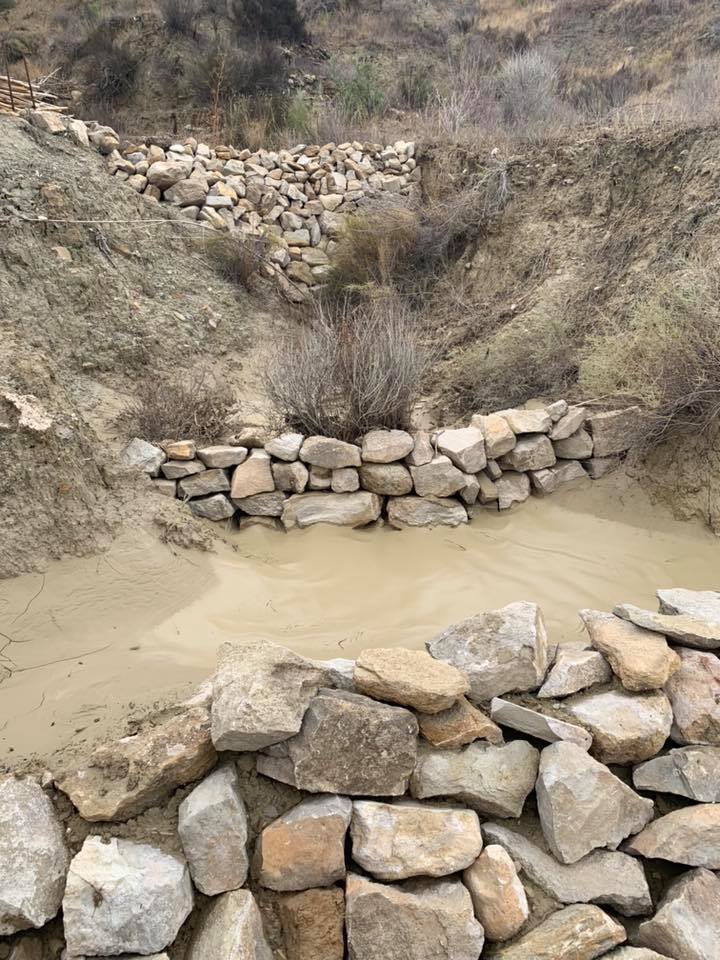
Later on, when the river was once again crossable, our drylands team went to find out what the rains had done to all of the hard work that has been poured into the area. We all wanted to know whether the walls had held or if the force of the water had knocked them away. To our delight, when the team came back, they had photos of the walls not only standing strong and proud, but having worked fantastically to slow and even stop the water. Areas of the drylands were all puddles and mud from the soil and water which had been stopped before it could flow away. It was cause for celebration and the main house was filled with our smiles of joy and relief.
***

The heavy rains have gone now, but the season is turning from summer gently into autumn. Since the storm we have had small showers of rain, the ground is still damp enough that we haven’t had to water the gardens for the last few days, giving us an unexpected luxury of time. But it’s not only the weather that is different, the landscape has changed. The poza is now far more open and elongated, as most of the caña were swept away or flattened, it gives us a view further down the river that is more open. Sweetcorn that we have been nurturing and growing through summer was knocked down by the power of the storm. The ram pump is not yet up and running, but our wonderful maintenance team are working hard to get it operating. By now the turtles have returned to Rio Aguas and the silt is settling out of the river. The trees, plants and people are all refreshed and rejuvenated by the downpour.
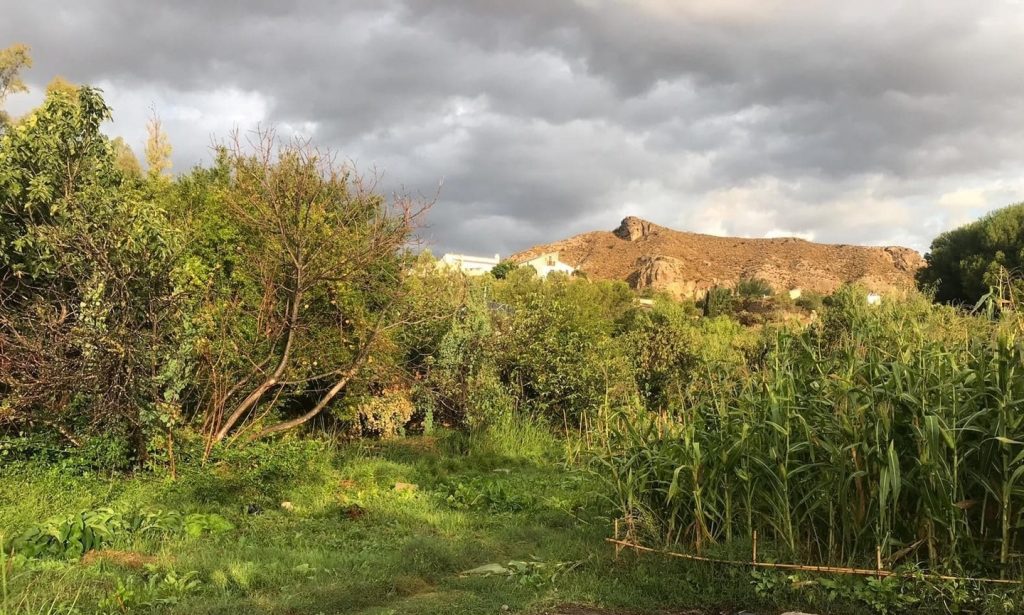
The land love the rain
0

Appropriate Technology

Los Molinos de los Rio Aguas got a sharp reminder never to take water for granted when the hydraulic ram pump that provides the whole village with water stopped functioning recently. With no water from the taps or showers, we had to collect it from the acequia (water line) – a tiring and time-consuming job every morning! With the pump needing replacement and improvement on an old design, technical team assistant Joe and his friend Ryan stepped up to do the job; a stressful experience with no test run requiring a lot of determination and teamwork.

DSC02170

The first self-acting ram pump was invented in 1796 by Joseph Montgolfier, co-inventor of the hot air balloon – the designs now change depending on location and equipment, but the idea remains the same. Ram pumps use the kinetic energy created from the water source when the impulse valve (pressure head) pushes it to an outlet of higher elevation. Unless you use a petrol pump, the ram pump is a zero-pollutant technological piece, perfectly appropriate for the ecovillage which Sunseed is a part of.

According to Joe, ram pumps can be used anywhere as long as there is some height for water to drop from to create the correct flow and a consistent and sufficient source of water such as a river or brook. Therefore, the diverse terrain and undulating region of Andalusia makes the ram pump the perfect source of water for Los Molinos and Sunseed.

The new ram pump was successfully completed within one full working week, much cheaper and more efficient than getting one made and delivered. Ram pumps can cost up to €3,000, while Joe and Ryan estimate that all the equipment is only around €550. They also both agree that the fact that no external energy required is key, avoiding added equipment and the use of any manual labor after construction except for the annual maintenance check.

DSC02176


Water is delivered at all times now to all taps and tanks twice as efficiently as the previous pump and with a perfect water cycle – any extra water falls back to the river, so none is wasted. Across a large area that is arid and dry, an even distribution of water is available to the whole village and this should be the case for the next 40-60 years which is 2 or 3 times as long as the last ram pump lasted, approximately 20 years.

Joe and Ryan made the ideal ram pump for all the villagers in Los Molinos and we thank them for it. Out of respect for nature and one another, Los Molinos continues to thrive towards our vision of low-impact, sustainable living.

by volunteer Lara Worthington

7

Appropriate Technology, Courses and Events

El último fin de semana de 16-17 de abril hemos llevado a cabo un taller de Tratamiento de Aguas Residuales por Fitodepuración, facilitado entre los coordinadores de Sunseed y el colectivo Paissano, amigos de Sunseed apasionados por temas de tratamiento y potabilización de agua. Hemos invitado a participar tanto a lxs voluntarixs de Sunseed como personas de la zona interesadas en aprender cómo construir un sistema ecológico de tratamiento de aguas residuales casero y de bajo costo. Después de cubrir los gastos básicos de comida y alojamiento el aporte económico ha sido voluntario.

Entre unos 10 participantes del curso emprendimos un proyecto práctico de mejorar la última etapa de nuestro sistema de aguas y embellecer el espacio alrededor del camino a la famosa poza de Los Molinos. ¡Construimos un estanque nuevo!

Pond 1

Los estanques están habitualmente instalados como la última etapa de sistemas de tratamiento de agua con humedales artificiales (reed beds). Sirven tanto para almacenar el agua depurada con fin de aprovecharla para riego, como para crear un hábitat natural de fauna y flora, así aumentando la biodiversidad del entorno. Nuestro estanque consiste de una zona de infiltración con grava (sembrada con plantas depuradoras – macrofitas) y zona profunda dónde en futuro queremos plantar macrofitas flotantes como lentejilla de agua o nenúfares. Cuenta con 1200 litros de almacenamiento y un desagüe instalado para regar una huerta/jardín ejemplo en el futuro. El diseño del jardín se realizará durante el Curso de Diseño en Permacultura en Sunseed (1-15 de mayo 2016).

Etapas de construcción

Digging pond
Pond mud

Primero lo primero, tuvimos que limpiar la zona de construcción, anteriormente ocupada por un estanque fantasma, cual con tiempo se había llenado con barro y ha sido apoderad de la omnipresente caña. Los rizomas de caña habían perforado la capa impermeabilizante de plástico, cual dejó de cumplir su función.  

Limpiando la zona del viejo estanque, mucho barro y rizomas de caña…

Después de cavar dimos la forma al estanque nuevo, a través de un proceso de diseño interactivo entre todxs llegamos al consenso de construir una isleta en medio y así naturalmente dar al estanque una pendiente de bajada alrededor de ella. Compactamos el fondo e instalamos el tubo de desagüe.

Installing overflow tube

Instalación del tubo de desagüe.

Impermeabilizamos el estanque con EPDM, un material resistente y flexible. Alrededor colocamos piedras y construimos un pequeño muro seco de ellas para proteger ante la caída del barro en caso de lluvias fuertes. Al seguir rellenamos la parte poco profunda con grava. Ahora solo falta rellenar el estanque con agua y sembrar plantas.

Guy and Blanca with pond

Pensando en los futuros habitantes de nuestro estanque hemos construido una cuevita, la futura casa de una rana muy feliz.

Pond plants 1
Finished pond

Con finalizar la construcción hemos abierto muchas posibilidades de crecimiento de este proyecto. Varias personas voluntarias de Sunseed van a tener la posibilidad de experimentar con la siembra de plantas, elaboración de un jardín autoregante con agua depurada y las modificaciones estéticas del mismo estanque. Como siempre en Sunseed, un proyecto nunca termina, sino va evolucionando…

Para mas información sobre proyectos y cursos parecidos, puedes contactar con nuestro coordenador de Tecnologías Apropriadas, Piotr: piotr.jankowski@hotmail.com.

0

Appropriate Technology, Courses and Events, Sunseed News

Sunseed’s Appropriate Technology co-coordinator Piotr explains how we built a beautiful pond as part of our eco-friendly wastewater treatment system.

Last weekend of 16-17 April at Sunseed we conducted a workshop on Ecological Wastewater Treatment, facilitated by the coordinators of Sunseed and the Paissano collective – friends of Sunseed and big water treatment and purification enthusiasts. We invited both Sunseed volunteers and people from the Almería province interested in learning how to build a low cost ecological wastewater treatment at home. The financial contribution to the course was voluntary, after assuring the basic costs of food and accommodation.
Among some 10 participants of the course we undertook a practical project to improve the last stage of our wastewater system and beautify the space around the path which leads to the famous pool of Los Molinos. We have built a new pond!

Wastewater treatment pond

Ponds are often installed as the last stage of wastewater treatment systems with constructed wetlands (reed beds). They serve a basic function of storing the treated water in order to reuse it for irrigation, as well as to create a natural habitat for fauna and flora, thus increasing the biodiversity of the environment. Our pond consists of an infiltration area with gravel (planted with water treatment plants – macrophytes) and a deep area where in the near future we would like to plant floating macrophytes. It stores 1200 liters of water and is equipped with an overflow system to irrigate an educational self-irrigating garden in the future. We will leave the garden design to the participants of a Permaculture Design Course held by Sunseed between the 1st and 15th of May.

Construction Stages

First things first, we had to clean the construction area previously occupied by a ghost pond, which with time was filled with mud and has been taken over by the ubiquitous cane plants. The rhizomes of cane had pierced the waterproof layer of plastic, which had thus stopped serving its function.

Digging the wastewater pond
Preparing the wastewater pond

Cleaning the old pond area – a lot of mud and cane rhizomes…

After the digging we interactively and collectively designed the form and shape of the new pond. We decided to construct a division wall which allows to have a natural slope around it. Subsequently the ground was compacted and the overflow tube installed.

Installing overflow tube

Installation of the overflow pipe

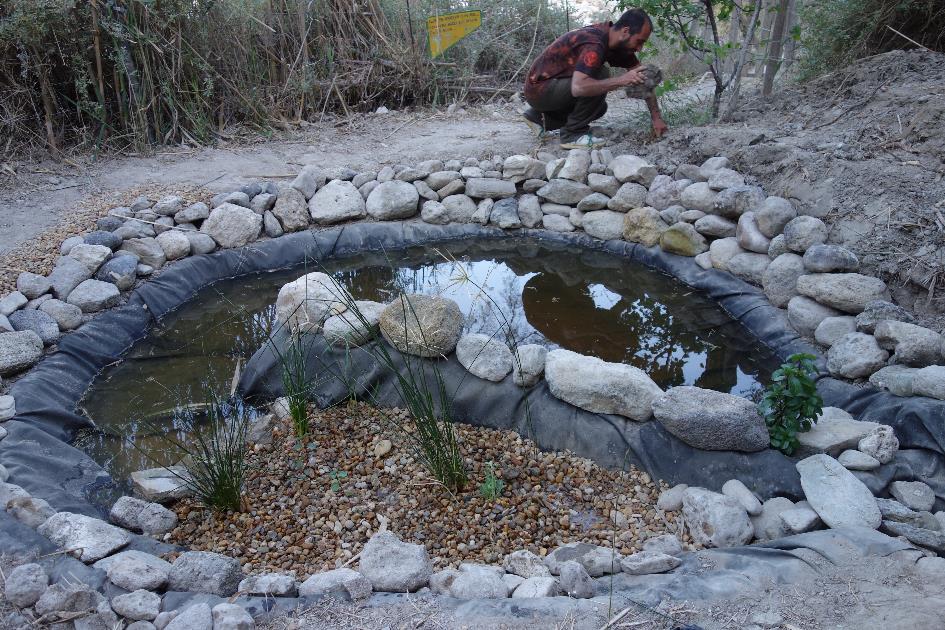
We waterproofed the pond with EPDM liner, a very strong and flexible material used widely in this type of application. Around the pond we placed stones and built a small dry wall to protect the pond from mud falling inside during heavy rains. Then we filled the shallow area with gravel. Next comes the exciting part of filling it with water and planting the plants.

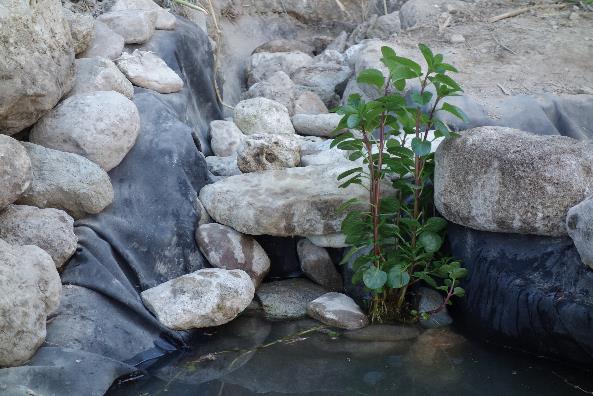
Guy and Blanca with pond
Petr and pond

Keeping in mind the future habitants of our pond we have created a small cave, a future house of a very happy frog.

Pond plants 1
Finished pond

With the completion of the construction of the pond we have only opened it up for the future improvements and changes. Many Sunseed volunteers will have the opportunity to experiment with the planting of plants, elaboration of a self-watering garden with purified water and the aesthetic modifications of the pond itself. As always in Sunseed, a project never finishes, it evolves…

For more information on similar future projects and courses, contact Sunseed’s Appropriate Technology co-coordinator Piotr on piotr.jankowski@hotmail.com.

1

Drylands Management, Tutorial

After a series of interventions in Arizona’s land, we have done the ultimate one!

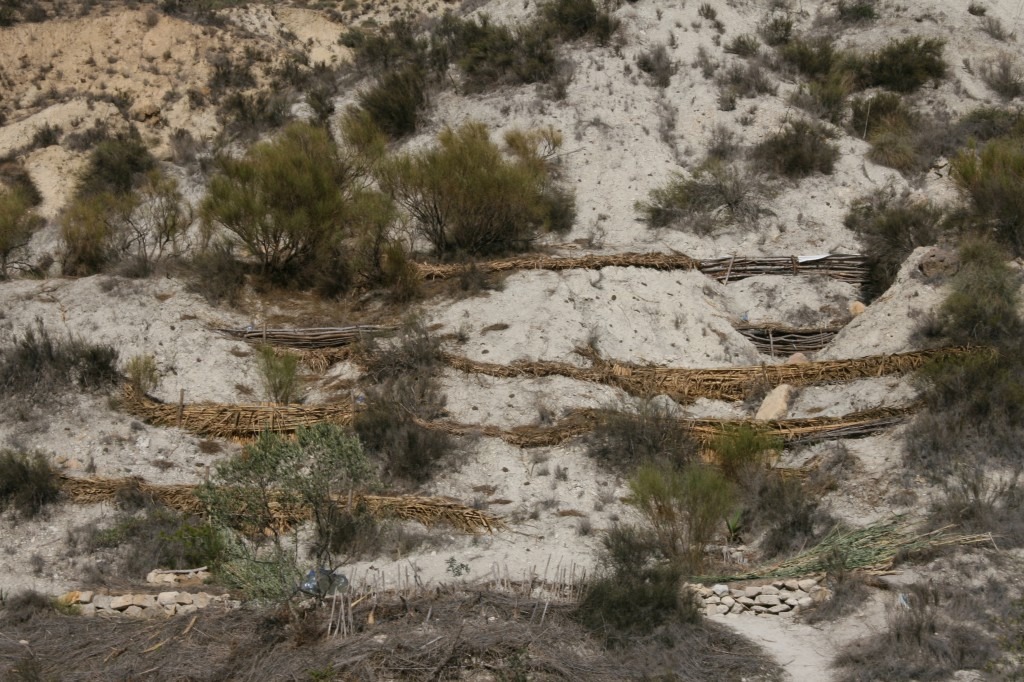
In the two gullies in the plot, we have built reed and woody barriers to stop soil erosion. The barriers have been interconnected through reed biorolls which were placed using the Key Line technique, addressing the water from the gullies to the slopes to make it more accessible for the plants in them at the same time that erosion is reduce too. Plants have been planted behind the barriers and along the biorolls adding compost as nutrient resource and cactus as water resource. The holes were filled up with water before planting and all has been covered with mulch.

Compost and cactus mixed

It is interesting to know that those plants that had been for too long in a pot need regular watering and in order to face that the following was done:

Bottles of five liters had a hole made in the bottom with a hot metal stick. This hole shouldn’t be bigger than the thickness of the rope that is going to be put in and laid around the bottom of the plant hole. Once the rope is properly glued to the bottle, it’s filled up with water and and placed in the plant hole. By leaving the lid half opened the water will be driven out of the water bottle to the soil along the rope when it is dry keeping a balance of dampness between the two environments, basically an osmosis process.

Water bottles
Water bottles
Water bottle in place

Below the gullies there is a flat area where some work has taken place too.

Trenches were dug taking into account the entrance of water from the gullies (as ripples created by a rock thrown into a pond) and with the same technique applied to the bio-rolls pursuing similar effect. The arriving water filters through and gets absorbed by vegetation planted in the terraces built along them. Along the terraces a mound like pile of earth was created as protection for the planting.

The area between and in the terraces was covered with mulching as in the gullies.

Flat area
Flat area

The plants used for this last intervention were mastic (Pistacia lentiscus), retama (Retama sphaerocarpa), olive trees (Olea europaea), rosemary (Rosmarinus officinalis), efedra (Ephedra fragilis) and carob trees (Ceratonia siliqua).

Plants used

Lastly, another project was carried out in Alan’s land, a nearby Sunseed’s plot:

Retama is a plant that has a symbiosis relationship with a mycorrhiza found in the soil. Six plants have been planted near an adult retama, and another six far from retama and any other plant. The growth is going to be monitor to see the development of both groups.

Retama project with adult retama a)
Retama project with adult retama b)
Retama project without adult retama a)
Retama project without adult retama b)

Después de una serie de interven­ciones en la parcela de Arizona ya hemos terminado la última!

En las dos cárcavas de la parcela hemos construido barreras de caña y ramas de granado e higuera para parar la erosión del suelo. Las barreras están interconectadas con biorrollos de caña que fueron colocados según la técnica de la Línea Clave, redirigiendo el agua de las cárcavas hacia las laderas haciendo que ésta sea más accesible para las plantas en esa área y reduciendo así la erosión en las cárcavas al mismo tiempo. Se han plantado plantas detrás de las barreras y a lo largo de los biorrollos añadiendo compostaje como fuente de nutrientes y chumba como fuente de agua. Los agujeros preparados para plantar se rellenaron de agua antes de poner la planta y todo se cubrió con acolchado.

Cárcavas
Cárcavas
Mezcla de compost y chumba

Es interesante saber que aquellas plantas que habían estado por mucho tiempo en una maceta necesitan que sean regadas regularmente y para arreglar esa situación se hizo lo siguiente:

Se agujerearon por el fondo botellas de agua de cinco litros con una barra de metal caliente. El agujero no debe de ser más ancho que la cuerda que se va a colocar desde ese punto y el suelo en el agujero alrededor de la planta. Una vez que la cuerda se pega correctamente a la botella, ésta se llena con agua y se coloca en el agujero de la planta. Dejando la tapa de la botella medio abierta, el agua se trasladará de la botella al medio externo cuando éste se seque para mantener un balance de agua entre los dos medios, básicamente se trata de un proceso de ósmosis.

Botellas de agua
Botellas de agua
Botella de agua colocada junto a la planta

A los pies de las cárcavas hay un área llana donde también se ha estado trabajando. Se cavaron zanjas teniendo en cuenta la entrada de agua desde las cárcavas (como olas creadas por una piedra que se tira a un estanque) y con el mismo gradiente impuesto a los biorrollos, buscando el mismo efecto. El agua se filtraría en las zanjas y sería absorbida por las plantas que se han plantado en las terrazas. A lo largo de las terrazas se trazó una línea como un montículo de arena como protección para las plantas.

El área entre y en las terrazas se cubrió con acolchado igual que en las cárcavas.

Área llana
Área llana

Las especies utilizadas en esta intervención han sido el lentisco (Pistacia lentiscus), retama (Retama sphaerocarpa), olivos (Olea europaea), el romero (Rosmarinus officinalis), efedra (Ephedra fragilis) y algarrobos (Ceratonia siliqua),

Plantas usadas
Plantas usadas

Por último, a la misma vez que este proyecto, otro se llevó a cabo en la parcela de Alan, cerca de Arizona:

La retama es una planta que establece una simbiosis con la micorriza que se encuentra en el suelo. Seis retamas se plantaron cerca de una retama adulta y otras seis se plantaron lejos de retamas y cualquier otra planta. El crecimiento de estos dos grupos va a ser monitoreado para ver el desarrollo de los mismos.

Proyecto de la retama con una retama adulta a)
Proyecto de la retama con una retama adulta b)
Proyecto de la retama sin retama adulta a)
Proyecto de la retama sin retama adulta b)
0

Appropriate Technology
water pumpOne of the major projects and work of the Appropriate Technology department this summer has been a much needed renovation of the famous Sunseed ram pump! The ram pump is one of the best example of appropriate technology in Sunseed. It provides water to the village of Los Molinos from the ancient irrigation canals, 24 hours a day, 7 days a week, 365 days a year without any electricity or wires. The only energy it requires is the water pressure created by gravity. The ram pump has been in the village since the mid 1980’s, but it has not had a proper overhaul for years. This summer there were some problems with breakdowns and irregular performance. Our AT team rose to the challenge! Becky and Sara doing maintenanceEngineering interns Becky and Sarah at the pump DSC00039The pump needing some TLC Second leak bad repair and overgrown drive pipeOne of the leaks in the very over-grown drive pipe DSC00017A rusted up air vessel with the bad kind of holes… DSC000j08A cracked pulse valve plate. Turns out we don’t need one if the pulse valve rubber is thick enough…   Upgraded non-return valve2Above in picture is the old no-return valve on the feed tube provifing the village with water. The valve itself is the gray bit in the middle. and on each side of it is a small adaptor piece that connects it to the tube connectors. Turns out the inner diameter of the adaptor piece was only 10mm in diameter, and thus were a big restriction on the flow, as the inner diameter of the pipe is 16mm. Below in the picture is the beefed-up replacement. The water flow to the villagers almost dubbeled! Coning tube end for better flowEmil, our AT Coordinator, coning the end of the feed pipe to reduce water turbulence in the connection. DSC00141We made some changes as we fabricated a new air vessel, in particular we upgraded the feed pipe connection. Here you see the new sturdy 25mm brass fitting, replacing a flimsy 20mm plastic thing.DSC00142The AT team are now preparing to put in a new upgraded drive pipe. We recognized that stone-lining the trench for the drive pipe will stop most vegetation as well as erosion and to keep the trench clear for easier maintenance. It’s a big job, but we decided it was worth it, if only for the presentable estetics it adds. Gillian stone-lining day 4c Many volunteers had a chance to help in this project, and learn some useful stone walling techinques. Here are our volunteers Gillian (above), Natalie and Leonardo (below) working on the stone lining and supporting walls. Leonardo and Nathalie stone-lining day 2aLeonardo and Nathalie stone-lining day 2d A big thank you to everyone involved in the ram pump renovation of 2014!
0

Drylands Management, Research, Tutorial

As the growing conditions around Sunseed are very harsh with very little rain and soil depleted from nutrients, it is very important to use innovative methods to protect plants from the harshest sun in the summer and frost in the winter.

At the moment in the Arboretum, the application of mulch (mostly reeds) is tested to see its benefits for growth along with a new, water saving design for planting. Mulch is basically any layer spread to cover the soil, be it biomass, mineral mulch, such as stones or gravel. Our mulch of choice is reed due to availability, enhanced with some weeds as we pull them out. The most important benefit of mulching in an arid area, such as Los Molinos, is that it reduces the evaporation of water from the ground keeping the soil moist longer. It works also as protection against wind, winter frost and scorching heat of the summer. An additional benefit in organic mulch is that it will eventually decompose adding good quality, nutrient rich soil to the barren desert and while still in place, it will attract insects to add to the biodiversity. Some of the insects can even be beneficial to the plant as they can be predators of some more harmful insects.

3 REDUCEIllustration : Picture of one part of the Arboretum, covered in reed mulch

On the negative side for organic mulch, it will need replacing from time to time as it decomposes. It should also be noted that decomposition of the mulch requires nitrogen, which is available in fresh plant material, fertile soils and in fertilizers, so it is important to try and see to it that there is enough nitrogen available for the decomposition to not compromise the nitrogen available for the plant to grow.

We applied to some plants in the Arboretum a simple design for improving the irrigation system. The design include a trench around the tree filled with stones in terms to act as a water channel to irrigate the tree. In addition, we cover it with biomass and thorny branches to take extra protection agains wildbores.

other mulchDesign and methodology. a. Dig a trench around the plant (above and profile views). b. Put some thorny branches along the trench. c. Place some stones. d. Plant the plants e. Addition of mulch on the top.

2 REDUCE

Illustration : Tabacco with trench and mulch, surrounded by Aloe Vera which does not need mulch

In addition, a research was carried out to find out which plants benefit from mulch and what type and amount should be applied.

Table : water requirements and mulch recommendations for the plants in the Arboretum

Plants Water requirements Mulch need Comments
Lavender Dry conditions No
Rosemary Dry conditions Organic mulch for infertile soil No mulch but rock or gravel in normal conditions fungus diseases if overwatering
Lemon grass Hot and humid conditions A thick layer to keep the humidity and to protect from frost in the winter
Aloe vera Dry conditions Only mulch to avoid frost Moisture retention to be avoided, so no fresh organic material
Yarrow Dry to medium conditions 5 cm of organic mulch to avoid weeds Avoid overwatering for root rot and mildew
Lemon verbena humid conditions A thick layer to keep the humidity and to protect from frost in the winter
Calendula Full or partial sun and watering moderately Mulches help (weeds, pests, water evaporation…)
European fan palm Sunny and warm but tolerate cool temperature (until 7C) Mulches help keep shallow palm roots from drying out quickly Do not keep wet all the time
Pomegranate semi-arid mild-temperate to subtropical climate Mulch during spring and summer Water thoroughly twice a week on light soils and once a week on clay soils
Myoporum Dry climates Mulches help. Note : not directly base of the plant, let a sapce (4 to 6 inch layer)
Mediterranean buckthorn Normal to moist Mulch for connserving moisture
Cassie flower Dry/desertic climate leaf or bark mulch
Wattel Hot/dry climate Mulches help
Almond sub-tropical dry warm climate Mulches help. pine trees or alpha-grass Does not like exceed of humidity
kidney vetch dry grasslands and rocky environments with calcareous soil
Ruscus aculeatus – Rusco Dry and moist locations Mulches are used
Maguey – Agave americana Drought tolerant Gravel or rocks Well drained conditions. Avoid watering your agave in fall to help it toughen up for winter.
Kermes oak Dry, sunny slopes A mulch of the leaves repels slugs, grubs etc, though fresh leaves should not be used as these can inhibit plant growth
Sweet orange Moderate moisture 5-10cm of mulch, spread on at least a little bit larger area than the canopy. Leave 30cm area clear of mulch around the trunk to avoid rot and vermin Pine mulch would be ideal as orange prefers slightly acidic soil and it also passes water and air easily to the ground
African tamarisk Adapted to all conditions A thick layer of mulch is preferred as the leaves contain salt, which will increase the salinity of the soil when they fall
Common fig Moist conditions, weekly watering Thick layer of mulch to keep in the moisture Yellowing or dropping of leaves or fruit is a sign of drought stress
Hazel Can tolerate drought but needs watering Thick layer of mulch for moisture retention Don’t let mulch touch the stem or trunk of hazel as it may cause it to rot
Black hawthorn Moist soil, low tolerance to drought Thick layer of mulch for moisture retention and frost protection
Loquat Good drainage, doesn’t tolerate flooding. Otherwise adaptable 10-15cm of mulch Keep the trunk area clear of mulch for air to circulate to avoid rot
Peruvian pepper No soaking or flooding, otherwise adaptable to many moisture levels Any kind of mulch can be added
Opuntia Dry conditions, good drainage No mulch, or a little bit of dry mulch for weed control
Siberian elm Prefers moist soil but tolerates drought as well. No flooding Thick layer of mulch for moisture retention
Velvet mezquite Tolerates dry conditions well At least 3 meters in diameter of mulch for young plants. Older plants will benefit from moisture retention as well
Holly oak Tolerates dry conditions but thrives when some moisture is present 5-10cm of mulch. Only dry mulch around the root crown if any and no watering around root crown Dry mulch helps repel slugs and grubs while moist mulch may cause root disease
marjoram Draught tolerant but likes moisture. Doesn’t tolerate frosts. Mulch is beneficial but it is good to let it dry out between watering Cut back watering during the cool months and add more mulch for frost protection
Aleppo pine Good drainage, weekly watering in the summer, less in the winter 5-8cm of coarse organic mulch leaving the root crown bare to avoid disease Doesn’t tolerate flooding or extreme temperatures
Carob tree Fertile soils Wood chip mulch is the best, likes the provided nutrients from decomposing mulch
Olive tree Moist conditions 10-15cm of mulch. Straw is the best Leave the base of the tree bare Likes the added nutrients from decomposing mulch. Also benefits from moisture retention and cooling of the soil
Cork oak Mediterranean climate mulch the tree, keeping the mulch away from the trunk Not use fertilizer, decaying mulch is enough

Teniendo en cuenta que las condiciones en climas semiáridos son difíciles, es importante usar las mejores maneras posibles para maximizar los recursos hídricos y proteger las plantas de extremas temperaturas.

En el Arboretum, tratamos de ver el efecto del acolchado para maximizar el uso del agua. El Acolchado es, básicamente, una capa protectora del suelo. Puede ser tanto biomasa, acolchado mineral como piedras. El exceso de restos de caña proveniente de las limpieza de la acequia es la utilizarla como acolchado. El mayor beneficio del acolchado es que reduce la evaporación del agua y mantener húmedo el suelo. También protege de vientos fuertes, heladas y el calor más ardiente de verano. Además, acolchados orgánicos tienen beneficios adicionales. Como van descomponiéndose con tiempo, van añadiendo suelo de buena calidad, rico en nutrientes. A su vez proveen de hábitat para insectos y reptiles.

3 REDUCEFoto : Jardín Botánico cubierto de acolchado


En un jardín, un acolchado además de los beneficios ya mencionados, no deja que las malas hierbas crezcan. Pero por contra, también hay que tener en cuenta que la descomposición del mismo acolchado requiere nitrógeno del mismo suelo para permitir actividad bacteriana en el proceso de descomposición.

Aparte del acolchado, a los frutales y plantas medicinales les hemos labrado la tierra y cavado una zanja donde regar. La zanja se rellena de piedras y el resto con biomasa. Como protección contra jabalís se han añadido ramas con espinas (ver diseño).

other mulchDiseño y metodología. a. Cavar una zanja alrededor de la planta (planta y vista de perfil). b. Colocar ramas con espinas. c. Poner piedras a lo largo de la zanja. d. Plantar las plantas e. Cubrir con acolchado.

2 REDUCEFoto: Tabaco con zanja y acolchado, rodeado de aloe vera, el cual no necesita de acolchado

Diferentes tipos de plantas requieren diferente condiciones de humedad. Por tanto los acolchados pueden ser más convenientes en un tipo de planta u otro (ver tabla).

Tabla: Condiciones ambientales y recomendaciones de acolchado para las plantas en el Jardín Botánico

Plantas

Condiciones ambientales

Acolchado

Comentario

Lavanda

Ambiente seco

No

Romero

Ambiente seco

Acolchado orgánico en suelos yermos

Roca o grava en condiciones normales

Enfermedades fúngicas si se riega demasiado

Limoncillo / Hierba de limón

Ambiente de calor y humedad

Una capa gruesa para mantener la humedad y proteger de las heladas en el invierno

Aloe vera

Ambiente seco

Solo para evitar las heladas

Para evitar la retención de humedad no usar materia orgánica fresca, verde

Milenrama

Ambiente entre seco y poco húmedo

5 cm de acolchado orgánico para evitar malas hierbas

Evitar el exceso de agua por posible deterioro de la raíz y moho

Hierba Luisa

Ambiente húmedo

Una capa gruesa para mantener la humedad y proteger de las heladas

Caléndula

Luz solar total o parcial y riego moderado

Acolchado ayuda contra las malas hierbas, pestes, evaporación del agua, etc.

Palmito europeo

Sol y calor, pero tolera temperaturas bajas de hasta 7C

El acolchado evita que las raíces superficiales se sequen muy rápido

Evitar que el suelo esté húmedo constantemente

Granado

Clima semiárido con temperaturas suaves y/o subtropical

Durante primavera y verano

Regar dos veces en semana en suelos arenosos y una vez en suelos arcillosos

Siempreverde

Ambiente seco

No directamente sobre la base de la planta, dejar un espacio de 6 a 8 cm

Aladierno

Condiciones entre normal y húmedo

Indicado para conservar la humedad

Acacia espinosa

Clima seco/desértico

Acolchado de corteza y hojas

Acacia pycnantha

Clima seco y de calor

El acolchado ayuda

Almendro

Clima sub-tropical seco y de calor

El acolchado ayuda. De pino y de alfalfa.

Evitar el exceso de humedad

Albaida

Praderas secas y zonas rocosas de suelos calcáreos

Rusco

Zonas tanto húmedas como secas

El acolchado es aconsejable

Maguey – Agave americana

Tolerante a la sequía

Grava y rocas

Suelos o zonas con buen drenaje. Evitar regarlo en otoño para que para que se fortalezca para el invierno

Coscoja

Laderas secas y soleadas

El acolchado de sus hojas repele las babosas, larvas de insectos, etc, pero no usar las hojas verdes ya que pueden limitar el crecimiento de la planta

Naranjo

Humedad moderada

5-10cm de acolchado repartido sobre una superficie un poco mayor que el follaje del árbol. Dejar un área de 30 cm sin acolchar alrededor del tronco para evitar plagas y deterioro de las raíces

El acolchado de pino sería el ideal ya que este árbol prefiere suelos ácidos y también deja pasar el agua y el aire fácilmente hacia el suelo

Tamarix africana

Se adapta a todas las condiciones

Una capa ancha de acolchado sería lo mejor ya que las hojas contienen sal, incrementando la salinidad del suelo cuando se deshoja

Higuera

Ambiente húmedo, riego semanal

Se recomienda una capa espesa de acolchado para mantener la humedad

Amarillamiento o caída de hojas y frutos es señal de estrés por sequía

Avellano

Puede soportar sequías pero necesita ser regado

Capa gruesa de acolchado para retener la humedad

Evitar que el acolchado toque el tronco ya que lo puede deteriorar

Espino negro

Suelos húmedos con poca tolerancia a la sequía

Colocar una capa gruesa de acolchado para ayudar a la retención de humedad y proteger de las heladas

Nisperero

Suelos con buen drenaje ya que no tolera inundaciones. Adaptable al resto de ambientes

10-15cm de acolchado

Dejar el área alrededor del tronco libre de acolchado para circulación del aire y evitar deterioro del mismo

Pimienta peruana

No empapar o inundar o empapar, pero se adapta al resto de condiciones húmedas

Cualquier acolchado es apropiado

Chumba

Ambiente seco y suelos con buen drenaje

No se aconseja acolchado salvo una capa fina seca para evitar malas hierbas

Olmo siberiano

Preferiblemente suelos húmedos pero tolera secos. No inundar

Capa gruesa de acolchado para retener la humedad

Prosopis velutina

Tolera bien el ambiente seco

Por lo menos, acolchado de unos 3 m de diámetro para las plantas jóvenes. El resto también se beneficiaría por la retención de humedad

Encina

Tolera ambientes secos pero crece muy bien si hay algo de humedad

5-10cm de acolchado, que sea seco y solo sobre las principales raíces si hay y no regar la zona

El acolchado seco ayuda contra larvas y pestes mientras que el acolchado húmedo puede dañar las raíces

Mejorana

Tolera las sequías pero le gusta la humedad. No aguanta las heladas

El acolchado es beneficioso pero sería ideal dejarlo secar entre riegos

Reducir el riego durante los meses más fríos y añadir más acolchado para proteger de las heladas

Pino carrasco

Necesita de suelos con un buen drenaje, riego semanal en el verano y menos en el invierno

5-8cm de acolchado orgánico de grano grueso evitando cubrir las raíces principales por enfermedades

No soporta inundaciones ni temperaturas extremas

Algarrobo

Suelos fértiles

Acolchado con astillas de madera es lo mejor.

Le gusta los nutrientes que provienen de la descomposición del acolchado

Olivo

Ambiente húmedo

10-15cm de acolchado. Paja es lo mejor. Evitar cubrir la base del árbol

Le gusta los nutrientes que provienen de la descomposición del acolchado. También se beneficia de la retención de humedad por el acolchado y enfriamiento del suelo

Alcornoque

Clima mediterráneo

Acolchado pero lejos del tronco

No usar fertilizantes ya que es suficiente con los nutrientes que obtiene de la descomposición del acolchado

0

Appropriate Technology
Hola, today we made more space around our main water storage, to fit two new IBC tanks, buffering water from the village ram pump. DSC_0346Improving the supporting edge. -The blocks of concrete are inclined slightly in the direction of the tanks. DSC_0348Here’s the old tank, which was installed without any protection from the sun. It has now whitered and cracked from exposure to the elements. Two new tans are getting prepared with a protecting layer of black  acrylic paint, and a protecting screen made of cane, to shade out the sun since it would otherwise heat up our black tanks in the desert sun.

¡Hola! Hoy hemos hecho más espacio para dos depósitos para el agua que recogemos de la bomba de ariete.

DSC_0346

Los bloques de hormigón están ligeramente inclinados en la dirección de los tanques.

DSC_0348

¡Ya hemos retirado el depósito blanco y estamos esperando los dos negros!

0